Friday, 17 May 2013

Art Project 4- Day 40

This current project is now finished.
This time round I had to be more independent and manage the project myself. I had to work out how much time I should allow for each task. I think I worked out the timing fairly well, creating a schedule on my brief and creating deadlines in my google calendar.
Overall I stuck to my plan fairly well, only missing one deadline for my textures. I think setting goals for each stage of development helped me to stay on top of my work and stay on track.
If I had missed one of my goals by a bigger margin, then it could have been a bigger problem. In future projects I should allow extra time if anything happens, in this case I took some time off this project to go back over some previous units.

My google calendar proved to to be useful. At the start of the project I had set up reminders for each of my goals to keep me on track.
A nice feature of the google calendar is that as it is bound to my google account, I can view it on multiple devices, so I could receive reminders through my phone along with email reminders and viewing it on a PC too. So I'm always aware of when my next goal deadline is and I can work to meet it.

Having to manage my own project and it's pacing was a good experience for me, especially since I've applied for uni next year, and I'd have to be much more independent at Uni.

Thursday, 16 May 2013

Art Project 4- Day 39

I  have completly finished the whole model and created the renders for her. I have 5 renders showing a turn around of the model.

Tuesday, 14 May 2013

Art Project 4- Day 37

With the UV's all sorted today was simply about mirroring the model over to creat the full fox. There were a few bugs with tring to mirror, but Simon helped me out to fix it. So now she's fully fleshed out and is just in need of her final fur texture.The current texture is just a place holder of matte colours with no blending. The final texture should have a nice fur effect which will help with blending the different colours together.


Monday, 13 May 2013

Art Project 4- Day 36

Phew, It took a week, but I got the UV's all done :)


While creating the UV's I was experimenting with the textures too, this was from my first try at looking at how the markings may look and also help me clear up some of the seams, which are more noticeble on the tail. I was also experimenting with creating fur with the use of photoshop brushes.
Also while experimenting and moving the UV's I accedentally created this eye marking. It won't be used but I snaped a pic of it cause I thought it looked cool :)

Friday, 10 May 2013

Art Project 4- Day 32

Progress check
By the end of week five I should have finished creating the UV's and textures
 
I'm not currently on target to complete my textures and UV's. With a week left I am feeling the pressure a little bit to make sure I get it finished on time.

Friday, 3 May 2013

Art Project 4- Day 25

Progress check
By the end of week four I should have finished working on creating the model

Thursday, 2 May 2013

Art Project 4- Day 25

Time to start working on the UV's, yay!

OH GOD WHY!
I may be some time...

Tuesday, 30 April 2013

Art Project 4- Day 23

So more tweaks on the model how the body and head are joined. Not much too noticeble, just refining the shape.

Monday, 29 April 2013

Art Project 4- Day 22

Today I worked on combining the head and body together. I just need to line up all the verts first. I've managed to line it up quite nicely so tommorrow they should be attatched.


Friday, 26 April 2013

Art Project 4- Day 19

Today I went away from my model to work on one of my previous units, unit 15.

Thursday, 25 April 2013

Art Project 4- Day 18

I made a bit of progress on the body today. I mainly focused on adding some volume to it and starting to round it more. The tail has advanced the furthest so far.


Art Project 4- Day 16

The ears were a little tricky, trying to get the right size and curve, but I like them thus far.


Monday, 22 April 2013

Art Project 4- Day 15

I spent today fleshing out the head I started. I think I made very good progress on it. Tomorrow I'll tweak it a bit more and try to get the ears done, then I think I'll go back to the body for a bit.


Friday, 19 April 2013

Art Project 4- Day 12

I started the modelling process today. I'm starting in Maya to get the main shape done, but I may progress into ZBrush for detailing later on.

As with modelling a human head, I need to look at the topology for a fox head, especially if I want to rig it. Finding a photo of a fox fave on, I draw over what I felt the topology should be like. The important parts are the eye and mouth rings.
To start with I'll be modelling the head separately from the body.

Process so far on the face
I made a start on the body too, just matching the outline of the drawing. So she looks very flat a the moment.
Process on the body so far
Progress check
By the end of week two I should have decided on a design
 and begun modelling

Thursday, 18 April 2013

Art Project 4- Day 11

I'm thinking of maybe doing a digital 3/4 view drawing of her (yes it's a girl) which I could possibly put in my portfolio. I find drawing 3/4 views more tricky than side views.

This isn't quite spot on to the drawing I did the other day. I think maybe the neck is a bit long. When I start lining it in SAI it'll be easy to tweak it a bit.
I think I'll do this at home though and work on the model at college, since I can use SAI fine at home and sometimes there are problems with compatibility between my version of Maya and the colleges.

Wednesday, 17 April 2013

Art Project 4- Day 10

I showed my design to my Mum while I had my day off and she pointed out that the fox's body was a bit thin compared to its neck, so I tweaked this a bit. She also pointed out how the tail went over the back leg and I agreed that really it should go under and changed that too. It's not very noticeable on it's own, but you can see it when compared to the old image.
I'll probablly use this side view when modeling.


Tuesday, 16 April 2013

Art Project 4- Day 9

Today I tried drawing some fastasy foxes. I first drew a golden kitsune from mythology. While it looks nice, it looks a lot like Ninetales the pokemon, cause, you know, Ninetales is a golden kitsune.

Thinking about it logicaly, having as many as nine tails on the fox would just mean there's more I have to model. Nine tails is just the maxium number of tails that a kitsune can have. I decided to drop the number down to two. I changed the colour to white and, because it's my fave colour, accented it with blues and I really like it.

Monday, 15 April 2013

Art Project 4- Day 8

I started on some simple designs today. I have a thin, sly fox and a cute fluffy fox in standard kinds of colours.


Friday, 12 April 2013

Art Project 4- Day 5

I've deiced that I do want to create some sort of fox-like animal, so I've been doing some research and making mood boards.
Some photo references of foxes

Some cartoonish foxes, but still resemble real foxes in terms of their general shape and colour

Some slightly more fantasy like foxes. Their body's are generally similar though the colours vary more from real foxes
Out of all these pictures, I love the white and purple fox with three tails from Jade Dynasty and the shiny Ninetales from Pokemon. I like the white colouration and the multiple tails also look nice.

In Japanese mythology, a Kitsune is an intelligent fox with magical abilities that increase with it's age and wisdom. The more tails they have (they can have up to nine) the older and wiser they are. It is said that when a Kitsune gains it's ninth tail it's fur turns golden or white, though I may use a white colouration either way.

There are certain features that are common between most foxes, with some exceptions for the fantasy ones;
  • Light tail tips
  • Dark "boots" on thier legs
  • Dark tiped ears
  • Fluffy tails
  • Large ears
Progress check
By the end of week one I should have the brief done ✔

Thursday, 11 April 2013

Art Project 4- Day 4

So, apparently, when you go to cons, the large amount of people means it's very easy to catch something, and I felt horrifically sick on Tuesday and most of Wednesday. Towards the end of Wednesday I started feeling a bit better though and felt well enough to come in today.

So as said before, for this project we get to choose what it is we want to do. For this we also have to create a brief for us to work from, so I worked on that. I sort of know what I want to do as I said in my first post. I used the guide of previous briefs to help me. It basically will help me to stay on track each week with my work. I've tried to plan out what I want to have done each week, hopefully I've made it so that I will have time for everything.

Pitch

I plan to design and model a creature concept. I shall first come up with some designs on paper, then continue with the modelling process within Maya. In Maya I shall create the UV's required  for the model, then proceed to make the texture for the model in Photoshop.

I plan for the process to take up to 5 weeks in total, with approximately 1 week for designs, 3 weeks for the model creation and another week for the generation of the textures and final renders of said model.

Plan
 Based of my brief I've added reminders to my google calender as to where I should be finishing each part of the model.


Week one- Brief done
Week two- Design done
Week four- Model done
Week five- Textures done
Week six- Renders done

Monday, 8 April 2013

Art Project 4- Day 1

So we are now into the last stretch of the course. This is our Final Major Project, or the FMP. We shall be working by ourselves this time. This project differs from the previous ones, mainly because we decide on what it is we want to do. The work we produce would ideally be an addition to our portfolios as well.

I knew we would get to choose what to do before the half term break so I have had time to think about what I want to do. I had to decide whether to try something I may not be too good at to improve that grade, try something new to try and learn something else that may be useful to me, or just play to my strengths.
I think I might try to mix two of those options.

I want to create/design a character/ creature then model it with either Maya and/or ZBrush. After that, I may decide to try and rig the model so I can pose it, but this is unlikely to happen due to time constraints. Creating the model itself could take several weeks, and that's without having to create the UV's and textures, so I think I will leave rigging out of this project.

IDEAS

I have one main thought in my head currently. The weekend before we came back (5th-7th) I went to a my first con. I'm not going to go on about the amazing time I had, but rather about the two items I bought. One was a plush of a fox squirrel from the Studio Ghibli film Nausicaa of the Valley of the Wind.

His name is Teto
The second item I bought is something I've been after for ages. I found Okami: The Complete Works, an art book for one of my favourite games ever.
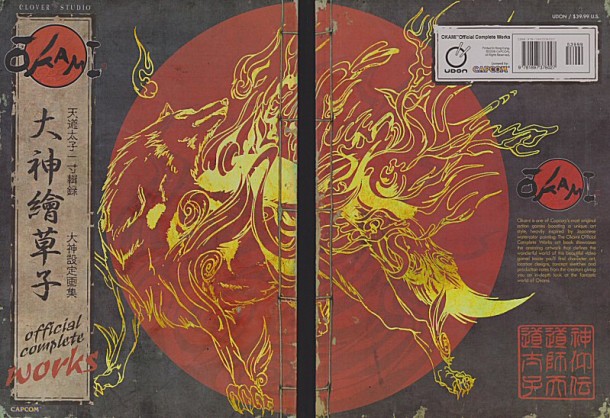
It's so beautiful!

So these two things mean I have  foxes and wolfs on my mind. I've always had a preference to drawing animals anyway and wolfs are my favourite animal, so I draw them a lot already (some might say i draw them too much). Thus I'm thinking of some kind of canine, but I'm not decided if I want to go for a realistic animal model, a cartoon styled animal model, or to create some kind of original canine creature.

Generally, with a few exceptions, wolves are not often seen in a good light. Most games that feature wolves in them have them as enemies. In folklore too, wolves are not shown in a good light.
Foxes seem to get it a little nicer. There is of course the repesentation of foxes being lean, sly and cunning, but there are some cases when foxes are just cute fluffy animals that appear in the background and do no harm. I'm leaning toward creating a fox or fox-like animal.

Personal reminder: This may be useful:  http://www.turbosquid.com/3d-models/red-fox-3d-model/589398

Friday, 22 March 2013

Collab Project 3- Day 46

I made a bird. I call him Flick.
Also today is the last day, but as far as I'm aware I have done the stuff I need to do.

Collab Project 3- Day 45

Mike wants me to adjust the jump animation a touch. I'm also working on a bird for us to have fly around the level, just to add some nice detail to it.

Tuesday, 19 March 2013

Collab Project 3- Day 43

I have my portfolio interview for Wolverhampton Uni tomorrow, so I've been spending pretty much all of today doing the last few tweaks to my portfolio.

Monday, 18 March 2013

Collab Project 3- Day 42

So the colouring is now done.
Step 4
Next is to put the layers into frame in Photoshop to see how the final animation looks.
Step 5
 And this I how it turned out.

Now the final step, to save all the frames seperately for Mike to use in Construct2.


And that's a character animation done. This is the sixth I've done for the character and should be the last one I need to do. I think Mike wants me to tweak a couple of the previous ones though.

Friday, 15 March 2013

Collab Project 3- Day 39

Having done the jump animation, I believe all that is needed for the main character is a death animation. I'm going to try and show the whole process I go through for my animations since I've only shown bits so far.

Step 1
I start in Photoshop. Photoshop allows you to have both animation frames and layers. When trying to animate in GIMP2, your frames are your layers so it can be quite awkward to do. I add in a frame from one of my previous animations for a bit of a guide.

Next I try to sketch out the animation. This can take a while to get right, so I check with Laura and Mike to see what they think. Some animations can take longer than others to do, simply because it can take a while during the sketch stage to get things to look right.
Sometimes I'll repeat the frames at the end of an animation when showing it to the others. This is because the animation loops continuously so adding more frames gives a small pause at the end.
Step 2
This is the animation thus far:
 Next I'll take this over to Paint Tool SAI, a program I use alot at home. I like using Sai, it's quite easy to use and for this protect I use the vector tool that Sai has. This makes nice smooth lines that I can click and move around, so editing and tweaking the animation is easy.
Plus it accepts and exports .pdf's, so I can easily switch between Sai and Photoshop. Sai doesn't have the ability to animate so I switch between the two programs frequently to check how the animation looks.
In Sai, I first start with just black lining the sketch.
Step 3
By using a technique called onion skinnning, in which I lower the opacity of each of the frames, I can see all the frevious to the one I'm working on. Exported back into photoshop to animate, the black lines look like this:
After another check with the others, I'll start to add colour. I can add colour in either program, but I tend to use Sai. If the animation ever needs eiting at a later date I'll do so in Sai, so having the colour in Sai would save me having to re-colour each frame in photoshop every time.

Thursday, 14 March 2013

Collab Project 3- Day 38

Finished jump animation. I just need to save the seperate frames for Mike.

Tuesday, 12 March 2013

Monday, 11 March 2013

Collab Project 3- Day 35

Today I worked on a jumping animation for the character.
These are the frames for the animation in an arc to show how it would look jumping while moving forward.

Friday, 8 March 2013

Collab Project 3- Day 32

I coloured in the running animation. I just have to go through it now and save all the frames seperately.


I made some platforms and ground for Mike to use.

Thursday, 7 March 2013

Collab Project 3- Day 31

I compared the running animation to the others and I could see what ws wrong. The character in the running animation was taller and thiner in compariosn to the others. I need to go through the frames and resize and edit them so they match the others better.

Here's the finished lines for the running animation that I'll colour tommorow. I reallt like this animation, I feel it turned out very good.

Tuesday, 5 March 2013

Collab Project 3- Day 29

I used Paint Tool SAI again to line the base I made yesterday, something seems a little off with it. I need to tweek it on Thursday and see what I can do to fix it.

Monday, 4 March 2013

Collab Project- Day 28

Mike asked if I could try a running animation as he thought the walking may be too slow for the game.

As a base I made this 7 frame run cycle


Friday, 1 March 2013

Collab Project 3- Day 25

I finished off the attack animation today.
This the three animations I've made over the last two weeks, put into one. I made this try try and get an idea how the three would look all together in game.